(With Third-Party Laundry Vendor Integration)
Table of Contents
-
Uniform Request
-
Goods Receive Note (GRN)
-
Cloth Tagging
-
Create Tag
-
Delete Tag
-
Reprint Tag
-
De-Assign Tag
-
Re-Assign Tag
-
Modify Status
-
-
Cloth Washing & Logs
-
Cloth Dropping
-
Cloth Washing & Bulk Update
-
Item Receiving (Mobile App + Manual Updates)
-
Cloth Collection & Delivery
-
-
Reporting Module
-
Vendor Order Report
-
Vendor Order Detailed Item Report
-
Cloth Wash Logs
-
Inventory Reports (Standard, Sized, Assigned Details, Pivot)
-
Cloth History Report
-
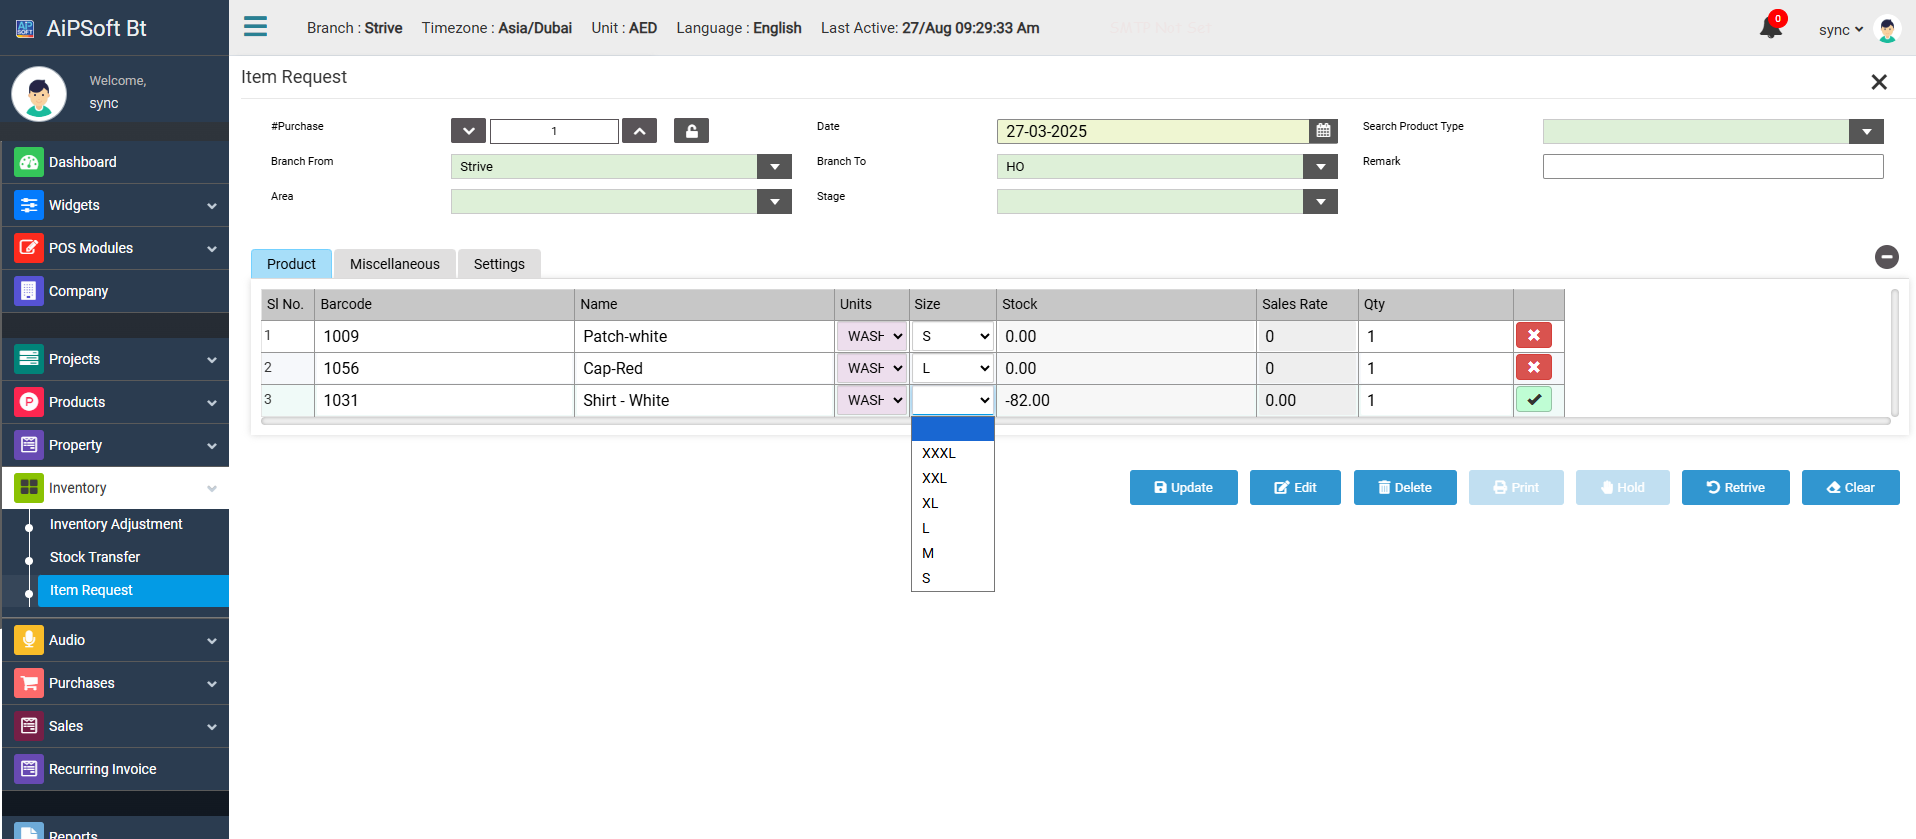
1. Uniform Request
The Uniform/Laundry Department may require new uniform sets for their stock. These can be requested directly via the Aipsoft Application.
-
Menu Path: Inventory → Item Request → Create Item Request
-
Steps:
-
Navigate to the Item Request module.
-
Fill in the required details such as item name, size selections, and quantity.
-
Add clear and detailed request notes (e.g., department, employee levels, seasonal requirements).
-
Once saved, the system generates a PDF Item Request Document, which can be downloaded.
-
👉 To learn more on how to perform an Item Request, Learn more....
2. Goods Receive Note (GRN)
Once uniforms are ordered, they are received from the supplier/higher department/purchasing team. This step ensures inventory correctness.
-
Menu Path: Inventory → GRN
-
Options:
-
Convert an Item Request directly into a GRN from the Item Request page.
-
Or create a new GRN directly without conversion.
-
-
Steps:
-
Navigate to GRN Module.
-
Select the supplier or department.
-
Verify received goods against the Item Request, paying attention to sizes.
-
Record the receipt into system inventory.
-
Save and confirm.
-
👉 To learn more on how to add a GRN, Learn more...

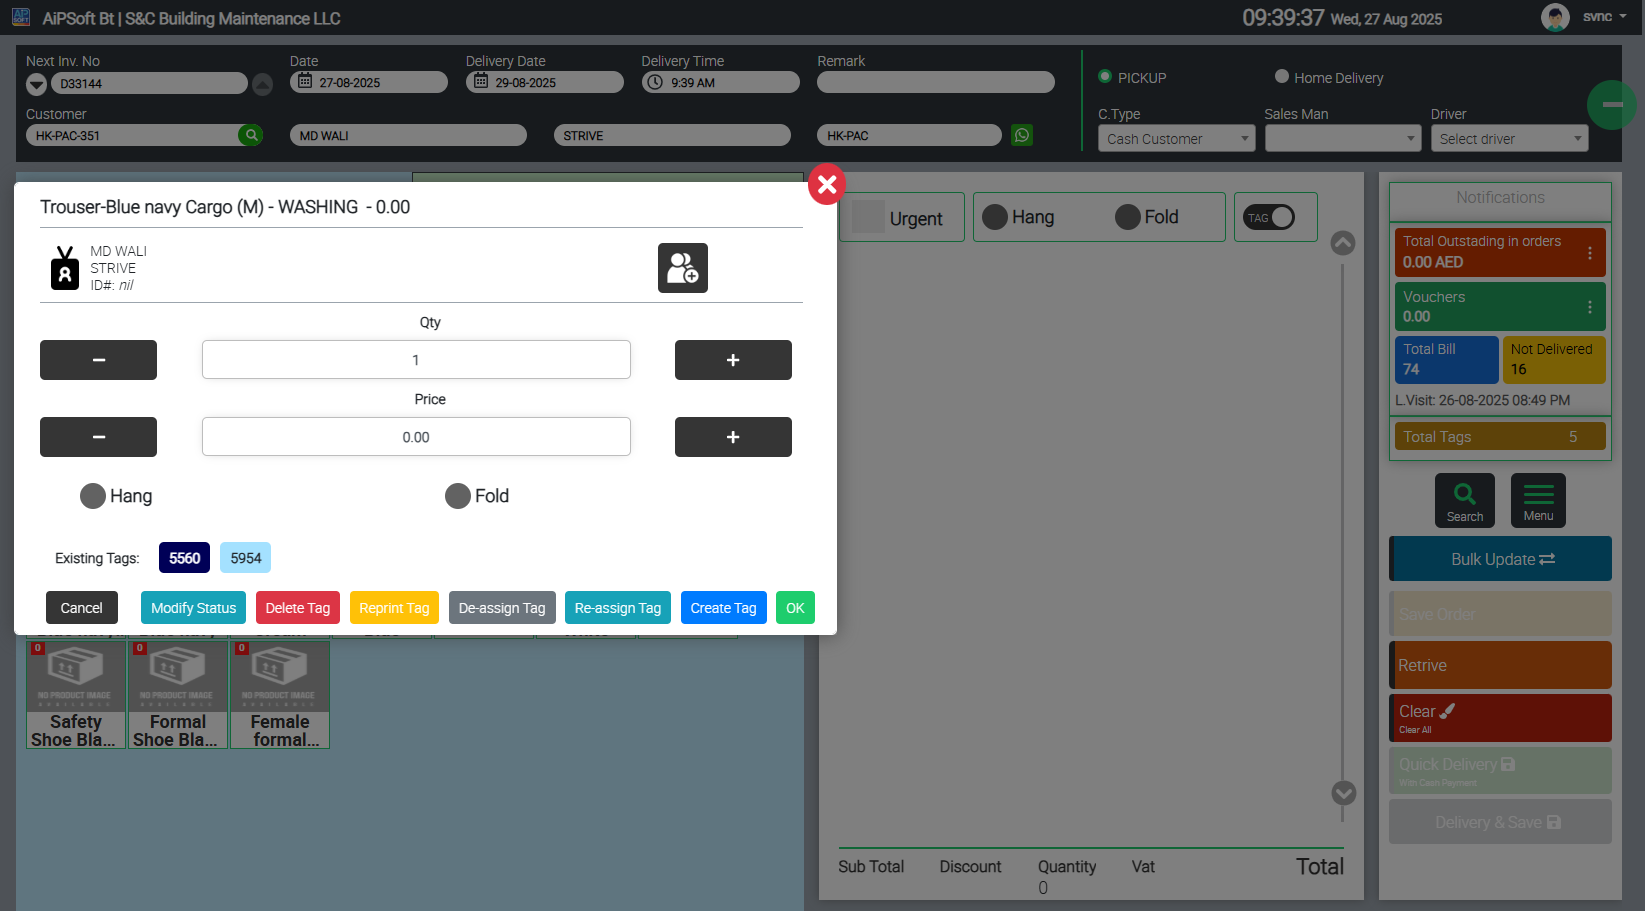
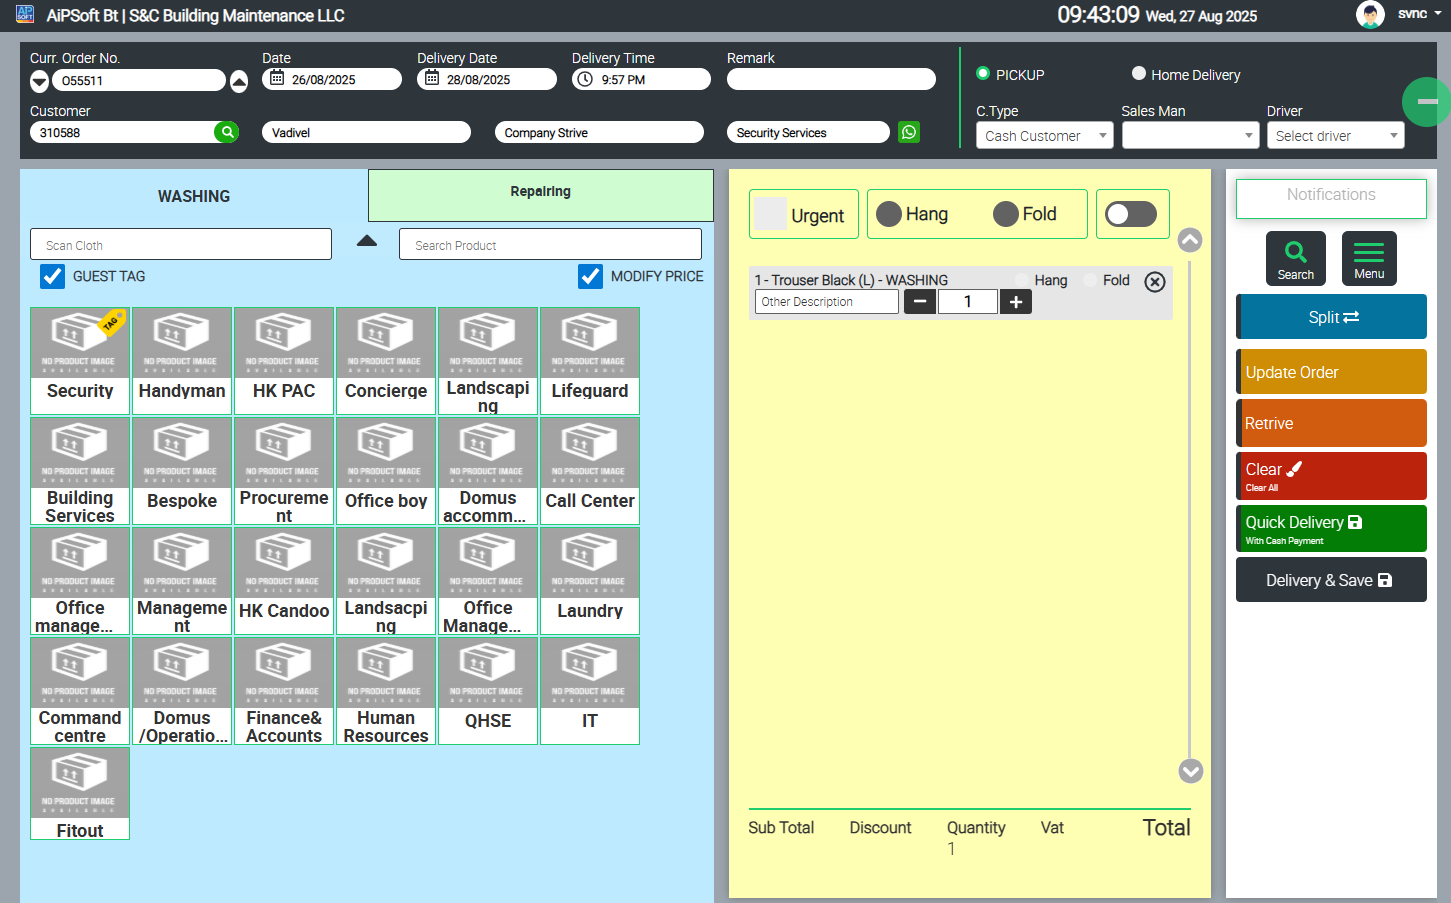
3. Cloth Tagging
Cloth Tagging is a core feature in the Laundry POS System. It allows uniforms to be tagged with employee names and details, ensuring tracking throughout their lifecycle.
-
Menu Path: POS → Sales → Laundry POS Interface
-
Steps:
-
Open the Laundry POS Interface.
-
Select Employee Information:
-
Already recorded employee info will auto-load.
-
Or click the search icon in the customer input area to browse the full employee list and select.
-
-
Choose the required Item → Select Size.
-
Tick both checkboxes:
-
TAG SYSTEM
-
EMPLOYEE TAG
(If either checkbox isn’t checked, the Employee Tag popup will not appear).
-
-
The Employee Tag Popup will now display with options:
-
Cloth Tagging Options
Create Tag
-
Creates a new cloth tag for an employee.
-
With multiple uniforms (e.g., 15 uniforms across employees), each can be queued for printing.
-
System generates a unique Cloth ID for each tag under the employee.
-
The Goods Received Inventory will automatically reduce when a tag is created.
-
Tags can be printed:
-
All at once (batch print from queue).
-
One at a time.
-
Delete Tag
-
Use when a tag was accidentally added or needs to be removed.
-
Permanent deletion will result in the loss of that Cloth ID.
-
System history remains, but the deleted cloth/tag/ID will be invalid.
Reprint Tag
-
If a QR code tag is damaged or lost, select the Cloth ID and reprint.
-
Goes to print queue but keeps same Cloth ID.
-
No history/log of reprints is maintained.
De-Assign Tag
-
De-assign cloth from an employee while keeping it in inventory.
-
All history/logs remain intact.
-
Useful for recycling uniforms without deleting them.
Re-Assign Tag
-
After de-assigning, assign cloth to a new employee.
-
Steps: Select new Employee → Department → Re-Assign Tag → Choose Cloth ID.
-
Same Cloth ID is retained.
-
Optionally: Reprint tag with new employee information.
-
System reports will show cloth usage history across multiple employees.
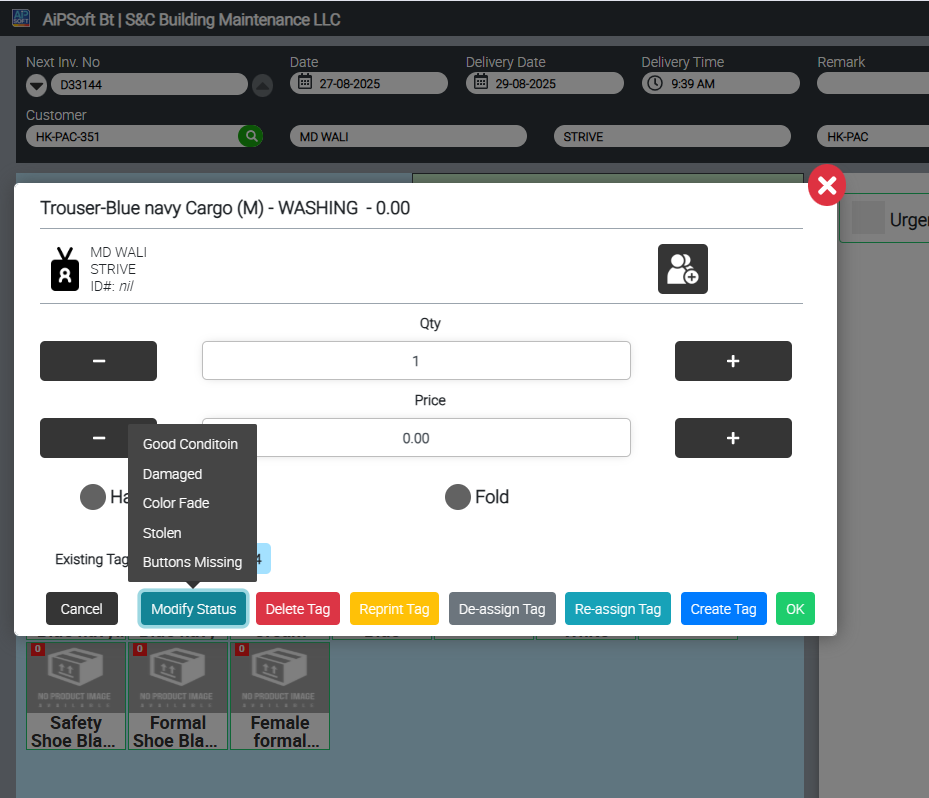
Modify Status
-
Allows updating cloth condition:
-
Good Condition
-
Damaged
-
Color faded
-
Stolen
- Buttons Missing
-
-
Defaults to "Good Condition" when first created.
-
New status types can be added from backend settings if needed.
4. Cloth Washing and Washing Logs
Cloth washing lifecycle is divided into 3 stages (configurable from backend if more steps are needed):
-
Cloth Dropping (Employee deposit)
-
Cloth Washing (Vendor washing cycle)
-
Cloth Collection/Delivery
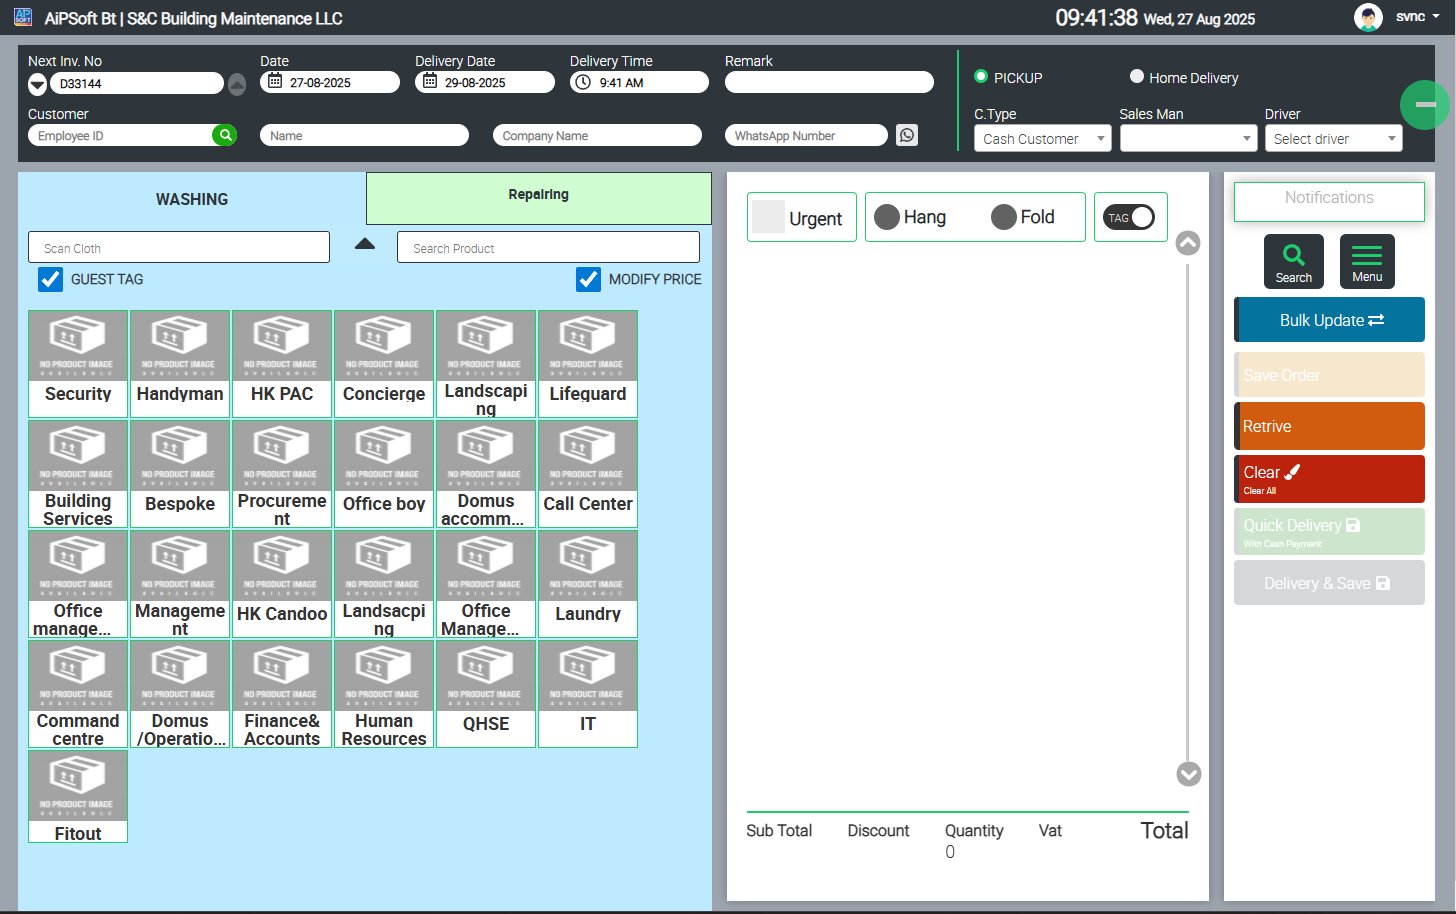
Stage 1: Cloth Dropping
-
Employee drops uniform in laundry basket or hands directly to staff.
-
In the POS window:
-
Go to Cloth Scan Section.
-
Scan cloth → Press Save Order (or press F2).
-
-
Receipt printed: Laundry Dropped Confirmation / Job Order Receipt.
-
Multiple cloths per employee can be scanned together (one job order).
Stage 2: Cloth Washing (Vendor Handling)
Option A – Bulk Update in POS
-
Navigate to Laundry POS → Bulk Update.
-
Select Date (usually "yesterday").
-
System shows all Job Orders created that day.
-
Move items from “Pending” to “Received Section.”
-
Update all items as “Received from Laundry Vendor.”
Option B – Mobile App (Highly Accurate)
-
Mobile app available on Android only.
-
Steps:
-
Download app from Play Store.
-
Login → Choose Packing Option.
-
Scan each cloth individually.
-
Each scan updates cloth as “Received / Washed.”
-
-
Advantage: 100% accurate (pending items remain pending).
-
Note: Time-consuming (requires dedicated staff or vendor).
Optional: WhatsApp Notification
-
Automated WhatsApp updates can be scheduled (e.g., 6 PM or 11 PM).
-
Message includes **#Orders Today, #Received Today, Pending Items
-
Group setup: Laundry Vendor + Client Employees.
Stage 3: Cloth Collection (Delivery to Employee)
-
After sorting and hanging clothes on conveyor → update in system.
-
Scan Order ID or Cloth ID → Open Order → Confirm → Click Deliver → Save (F10).
-
System updates as Green (Delivered/Collected) with date & timestamp.
-
Optional: WhatsApp message to employee confirming cloth is ready for pickup.
5. Reporting Module
Custom reports were built specifically for this client:
1. Vendor Order Report
-
Filter: Date Range + Department.
-
Report shows: Order #, Order Date, Billing Date, Room #, Order Qty, Received Qty, Pending Qty, Action.
-
Laundry vendor may optionally be given access to update orders here.
2. Vendor Order Item Detailed Report
-
Filter: Date Range + Product (Uniform).
-
Shows: Product Name + Order Qty (grouped by product).
-
Helps track volume of cloth handled by vendor.
3. Cloth Wash Logs
-
Filter: Date Range, Department, Product, Employee Name, Delivered/Not Delivered checkboxes.
-
Report: Cloth ID, Employee, Dept, Item Name, Order #, Order Date, Delivery Date.
4. Inventory Report (Standard)
-
Filter: Product, Department, Employee.
-
Shows: All inventory received on GRN → Assigned (reduced qty) → Balance.
5. Inventory Report (Sized)
-
Same as standard but includes size breakdown.
-
Clicking an item opens detailed drill-down.
6. Inventory – Assigned Details
-
Shows cloth → employee assignment details.
-
Filter: Dept, Product, Size, Cloth Status, Employee.
-
Report fields: Cloth ID, Employee, Dept, Item, Size, Assigned Date, Cloth Status.
7. Inventory – Assigned Details Pivot
-
Same as above but with Pivot functionality for cross-analysis.
8. Cloth History Report
-
Tracks all actions/status changes for any uniform.
-
Filter: Cloth ID, Employee Name, Cloth Condition, Status.
-
Fields: Cloth ID, Date/Time, Employee, Narrative, Cloth Status, Cloth Condition.
Advanced Features & Reference Guide
This section provides additional functions and quick references for advanced users of the Laundry POS System. These are not part of the core workflow, but help in managing exceptions, quick printing, and employee management.
1. Checking How Many Uniforms Are Assigned to an Employee
-
Open the POS → Laundry POS window.
-
Select the employee.
-
The system will automatically load the Employee Department and highlight items in a yellow tag.
-
Click on the yellow tagged item to view:
-
Number of tags assigned to the employee’s uniforms.
-
Cloth IDs assigned to the employee.
-
-
From this view, you can also:
-
Change cloth status.
-
De-Assign uniforms directly.
-
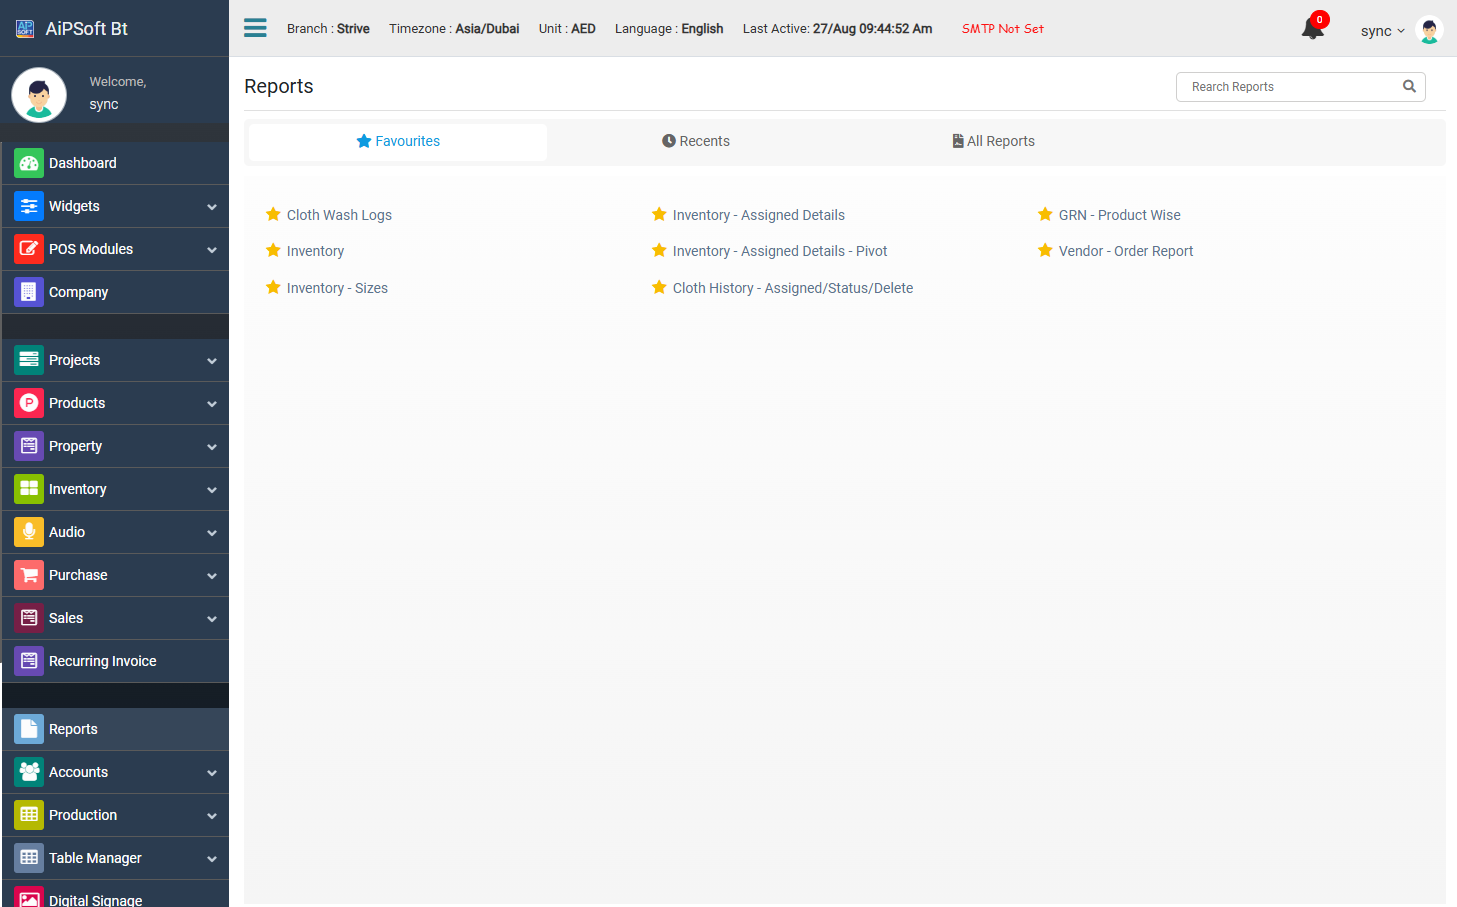
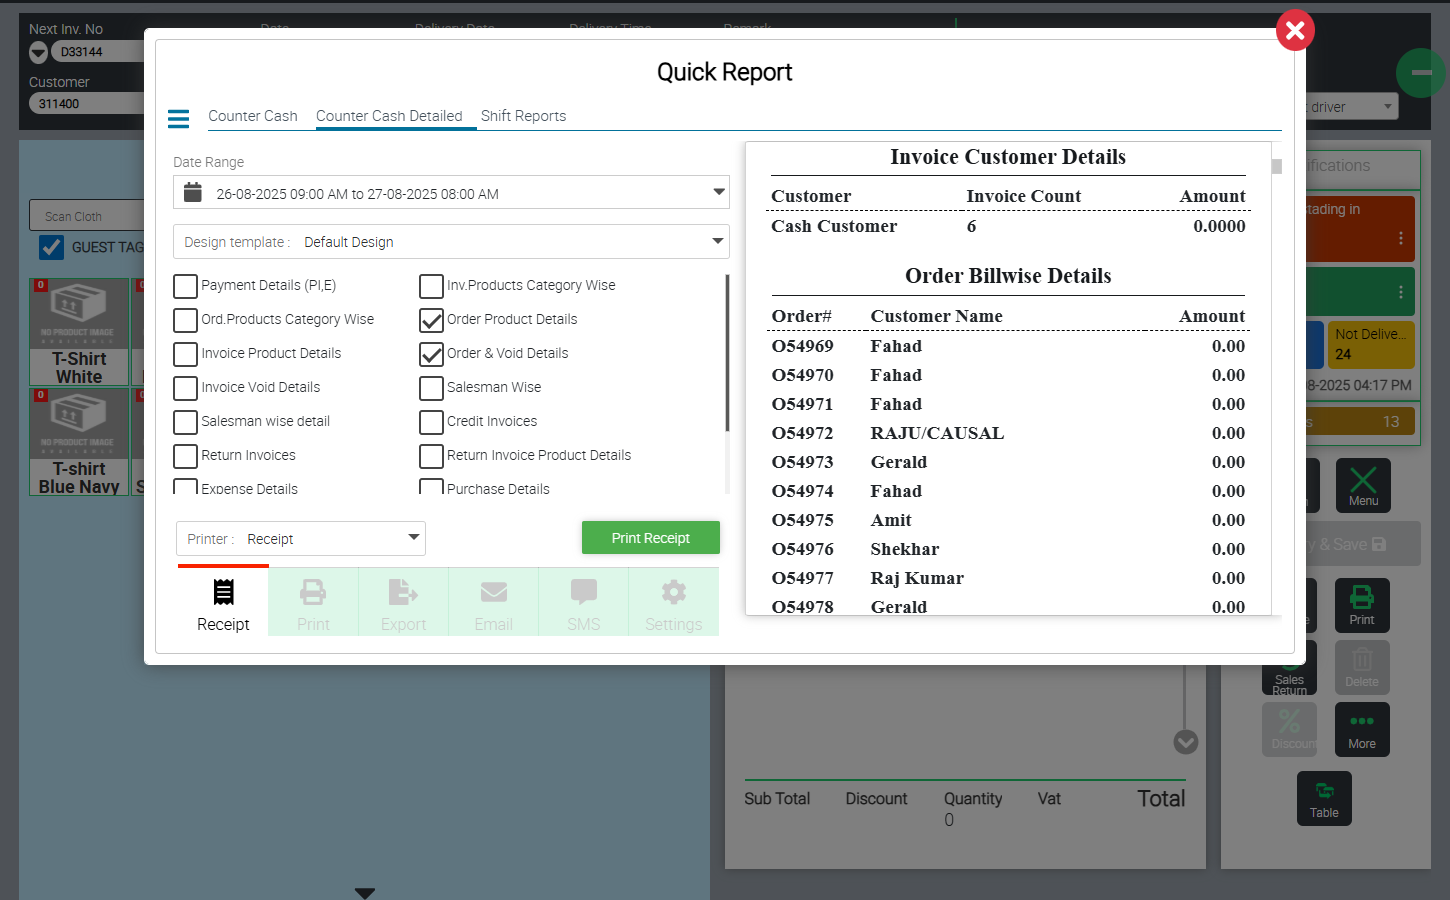
2. Printing Quick Reports to Thermal Receipt Printer
-
From POS → Click Right-Side Menu → 3-Dot More Options → Reports.
-
A Report Popup will appear.
-
From here, you can print quick summaries directly to thermal receipt printers, such as:
-
Today’s Collected Cloths
-
Today’s Collected Employee List
-
Additional daily reports
-
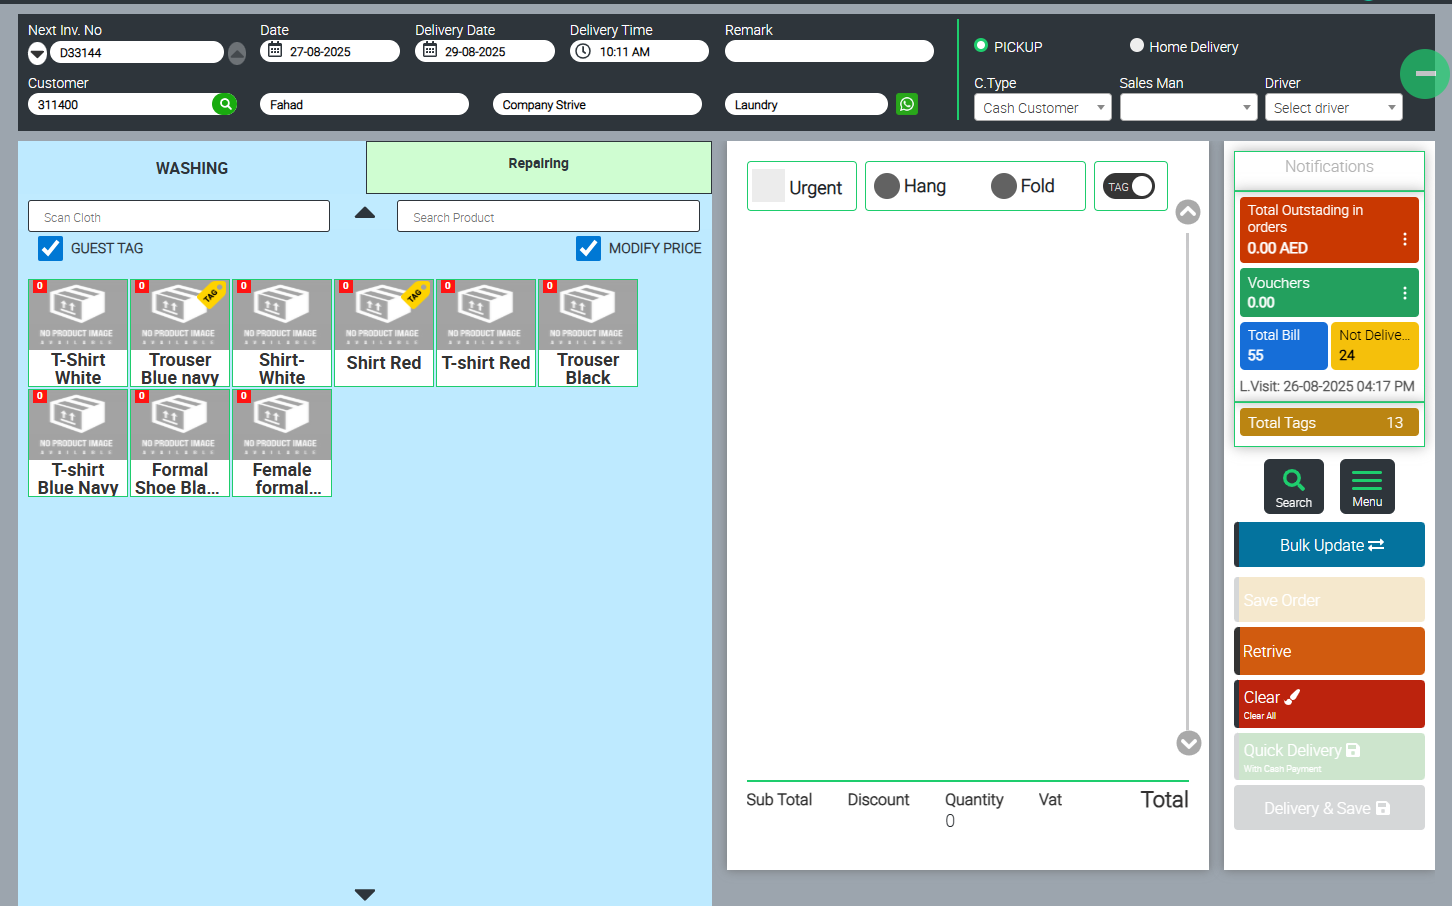
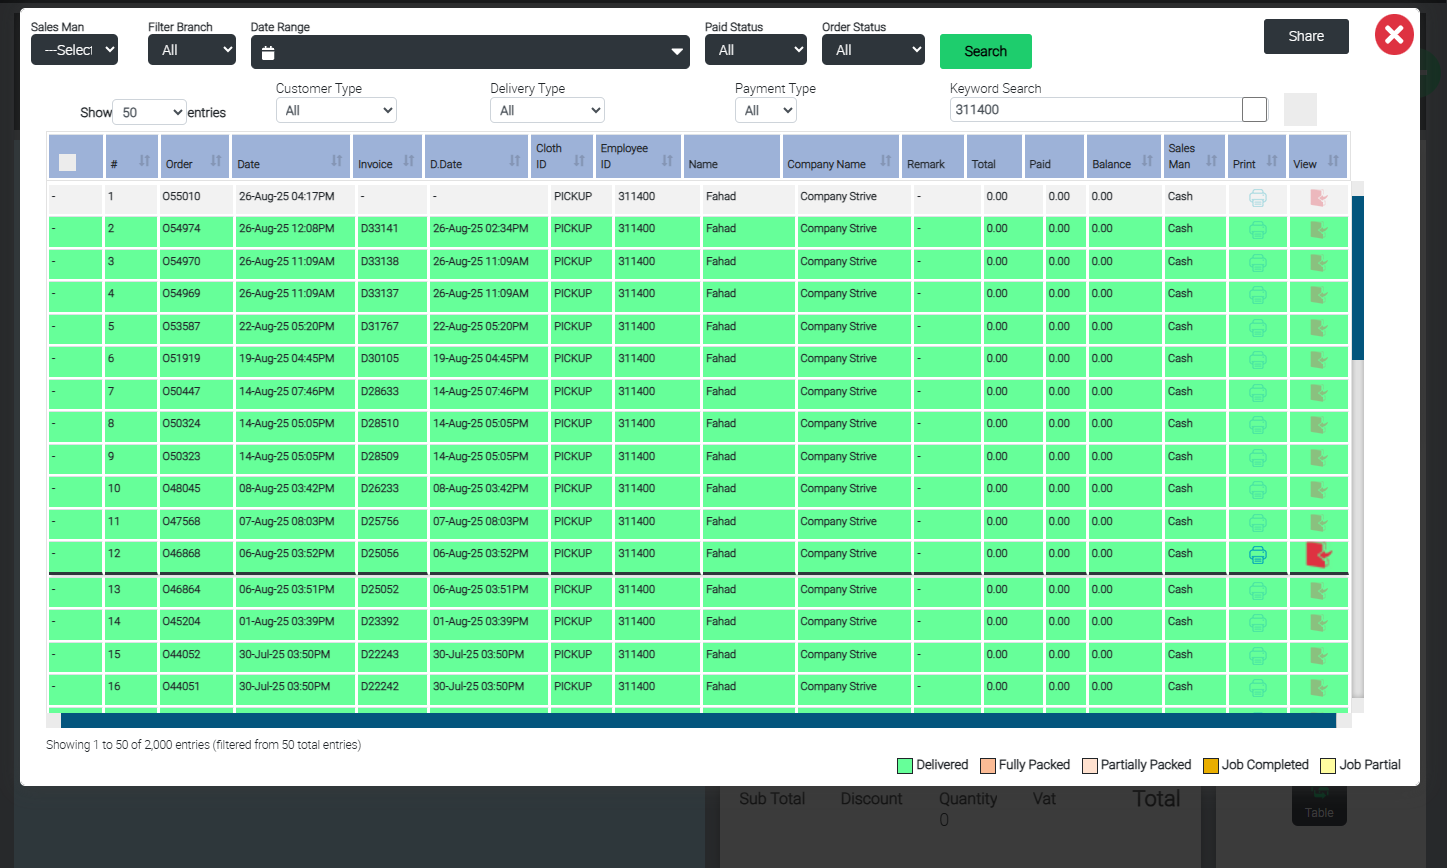
3. Editing an Order
-
From POS → Right-Side Menu → Search.
-
Search by Employee ID or Employee Name.
-
The system will display all orders for the selected employee:
-
White Background = Undelivered Order
-
Green Background = Delivered Order
-
-
To edit:
-
Select an Undelivered Order.
-
Open the order → Modify items (either by scanning or removing from cart).
-
Save/Update the order.
-
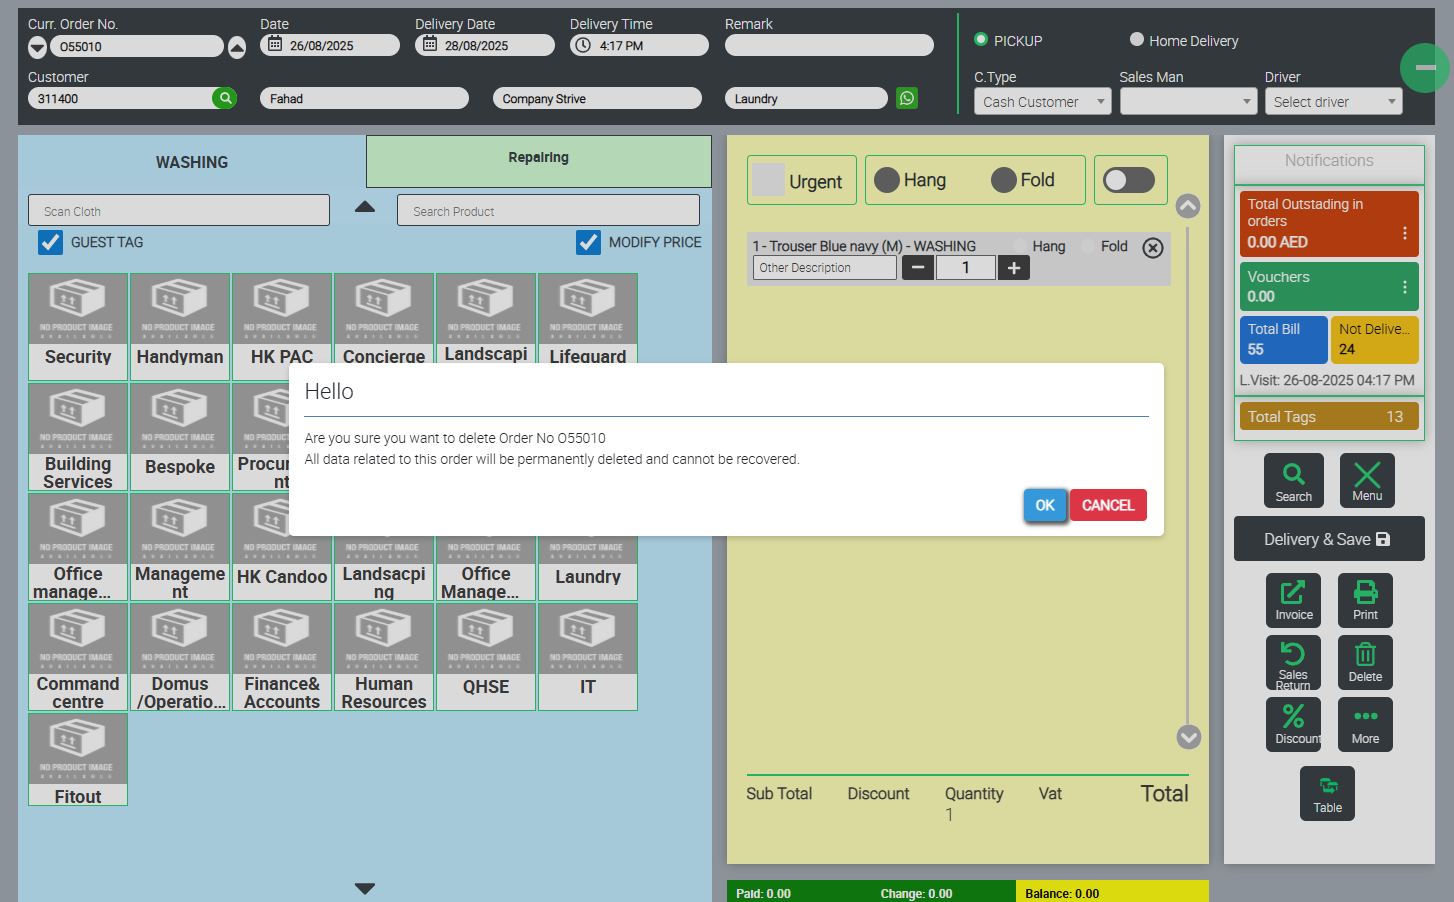
4. Deleting an Order
-
From POS → Open the order.
-
Go to Right-Side Menu → Delete.
-
Confirm to permanently delete the Job Order.
5. Adding a New Employee
-
Methods for adding new employees:
-
Backend Excel Upload: Import a batch list of employees.
-
Direct POS Entry:
-
Enter a new Employee Code + Employee Name + Department/Company Name.
-
Assign cloth immediately.
-
The employee record will be automatically added to the central master database.
-
-
Editing Employee from POS:
-
Use Right-Side Menu → Customer.
-
Search Employee ID → Edit → Update details.
-
-
-
⚠️ Ensure accurate data entry for employee codes/departments to maintain consistency.
